About Aegean Pools Retail

Aegean Pools is Hampton Roads, Largest and Most Reputable Pool Co, Heater's, Free Friendly Survey & Estimates, Liner & Fiberglass In-ground Pools, Opening & Closing, Pump & Filter, Repair & Replacement, Safety & Auto Covers, Salt Systems, Largest and Most Reputable Pool Builder, for All Your Pools Needs, for All Your Pool Needs, Line Replacement & Pool & Deck Renovation, Liner Replacement & Pool & Deck, Renovation.

Pool School 112 Automatic Chlorine Feeders

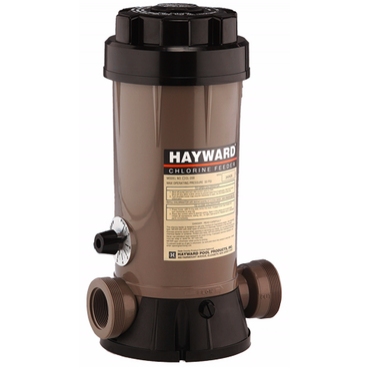
CL200Automatic chlorine feeders are designed to make caring for your pool easier. Don’t confuse and automatic chlorine feeder with a salt generator, while they both do the same thing (add chlorine to the pool water) they use different methods to achieve that end. So for the purposes of this discussion we are not going to discuss salt generators. There are many different types of automatic chlorine feeders; chlorine tablet feeders, liquid chlorine feeders and granular chlorine feeders. The most common type found in residential swimming pools by far is a chlorine tablet feeder. The other two types are most common to commercial pools and our focus here is going to be residential feeders.

Some people do not use an automatic chlorine feeder preferring instead to add their chlorine tablets to the skimmer on the side of the pool. While it is convenient to do this, it is fraught with potential problems like equipment damage. When you put a chlorine tablet in the skimmer you are introducing an extremely high level of chlorine directly into your filter system. When I say high level I am talking about levels 50 ppm or higher, this would be 10 times or more higher than the level you would keep in your pool. The problem here is that the equipment in your filtration system is made up of either plastic or metal components, chlorine is a strong oxidizer and very low in pH and will oxidize both metal and plastic. What this means is that the high concentration of chlorine will make all the plastic parts brittle and it will corrode away metal components in the system. The shaft seal on the motor has a metal spring to give the seal the compression it needs to keep water from leaking into the motor. Adding chlorine tablets to the skimmer can cause premature shaft seal failure from the extreme environment you create. If water leaks into the motor it will quickly ruin the bearings in the motor, and in short order you will need a new motor. It will also shorten the life of you skimmer basket and the spring in the multiport valve that you use to backwash the filter, not to mention what the chlorine is doing to the grids inside your DE filter.

When you add your tablets to the skimmer you will find it difficult to control the amount of chlorine in the pool because you don’t have any control over the flow of water through the skimmer. You will end up with either too little, or way to much chlorine in the pool water. Too little chlorine and you will have algae and potential bacteria issues, too much and you are wasting chlorine. Using a automatic chlorine feeder allows you not only to better control the amount of chlorine you are putting into the pool water, but also extends the time between additions of tablets to the feeder.

So the best way to avoid all these issues is to install an automatic chlorine feeder to your system. There are two different styles of automatic chlorine tablet feeders; in-line and off-line feeders. I personally prefer in-line feeders because there are fewer parts to be replaced and as you will recall from the previous paragraph, chlorine is brutal on the plastic components. An in-line feeder is inserted directly into the pipe after the filter and allows the concentrated chlorine to go back into the pool and get diluted before it goes through the system. An off-line feeder connects to the pipe with smaller tubes, one goes into the pipe between the pump and the filter and the other on the pipe after the filter going back to the pool. With this type of feeder about every three or four years you will have to replace the tubing and the fittings that connect the tube to the pipe.

A couple of tips for winterizing a chlorine table feeder; make sure you completely drain the feeder and if it has a drain plug do not reinstall the plug until you are ready to open the pool in the spring. If you winterize the chlorinator and re-install the plug condensation can form inside the feeder and when the temperatures drop below freezing they can freeze and crack the feeder. The other tip is when you winterize the chlorinator remove the cover from the feeder and leave it off the feeder. The reason you want to leave the cover off is that even though there are not any tablets in the feeder there is still a residual of chlorine in the feeder; this small residual will continue to break down into a chlorine gas and it will ruin the o-ring in the lid of the feeder. The o-rings they put on chlorinators are made of Viton rubber, an expensive rubber that is resistant to the effects of chlorine, they generally last about two years but less if you leave them on the chlorinator during the off season.

Well that is it class for Automatic Chlorine feeders, class is dismissed but if you are using chlorine tablets and you don’t have an automatic chlorinator, then your homework is to install a feeder before the next class.
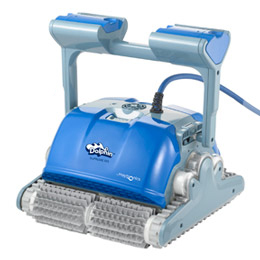
Pool School 111 Robotic Cleaners

Image

DOLPHINSUPREMEM5.1Since the beginning of the invention of automatic pool cleaners the designers have tried to develop the perfect automatic pool cleaner and each cleaner as progressed toward perfection.  We have in previous classes discussed manual cleaners (Pool School 108), pressure side automatic pool cleaners (Pool School 109), and suction side automatic pool cleaners (Pool School 110), what we have not discussed is robotic automatic pool cleaners.

For definition purposes a robotic automatic pool cleaner is defined as a self contained autonomous cleaning system.  This means that the unit does not require your filter system to be operating in order for the robotic cleaner to function.

Going back in time to the 1960’s and the first robotic like automatic pool cleaners were made by Aqua Vac and they were called the Aqua Queen for residential pools and the larger pools the Aqua King.  These cleaners were very heavy and did not contain any computer controls.  They were mechanically affected by bumping into something which would cause them to change direction randomly.   The Aqua Queen had a cartridge filter on board so it actually filtered the pool water.  These units were extremely durable and still operate today after 50 years!

The next major change in robotics came in the early 1980’s with the introduction of the Aqua Bot.  This unit was originally designed and built in Israel. It was the first cleaner to introduce a computer circuit board built into the cleaner.  These early models took off in sales and were marketed everywhere including the Price Club.  The manufactures choice to sell them at the Price Club dissuaded most swimming pool retailers from selling the product.  That fact combined with early design issues caused this cleaner to have a dry spell in sales until better designs came along.  Problem one was water and computer circuits just do not get along well together and moisture getting into the circuitry was an issue.  The other big issue was it would operate in the pool and out of the pool.  I know from personal experience when a customer who had taken one home to “try it out” called me and told me the cleaner had climbed out of the pool and was going across the yard!

In the last 30 years designs have come a long way and the Aqua Bot from the 80’s would be no match for a robotic cleaner today.  Today there are a dozen or more robotic pool cleaners on the market.  Price points range from $300 for and above ground pool cleaner to thousands of dollars for a commercial robotic pool cleaner.  It is safe to say that in robotic pool cleaners you get what you pay for.  It is best to stick with an automatic pool cleaner for in ground pools that will start around $800 and go up in price from there.

Many of the robotic cleaners today have quick clean cycles and large filter capacity that will clean your pool from top to bottom.  No other type automatic pool cleaner can make that claim.  No pool cleaner is 100% perfect, in other words they will no doubt miss a spot here and there.  The top of the line robotic cleaners solve this problem by offering a remote control function.  If when the cleaner has finished cleaning the pool and you find it missed a spot with the remote control you can manually direct it to the spot it missed!  This saves you the hassle of pulling out the manual cleaner and cleaning it yourself.

The other big advantage robotic pool cleaners have over all other types of pool cleaners is that they are energy efficient.  You have to run an extra pump for a pressure side cleaner and for the suction side cleaner you have to run your main pool pump which cost considerably more than a robotic cleaner that runs on 24 volts. The power consumption is a fraction of the other cleaner options which saves a lot of money.

Easy to operate, inexpensive to run, and very reliable robotic pool cleaners are beginning to dominate the automatic pool cleaner market and who knows perhaps one day in the near future and engineer will design the perfect automatic pool cleaner!

Well Pool School is over for 2013 enjoy your off season break, school will resume in March 2014 when we will talk about automatic chlorinators.  Enjoy your break!

JOIN OUR E-NEWSLETTER MAILING LIST JUST FILL OUT THE FORM BELOW.

Pool School 110 Automatic Pool Cleaners Suction Side Cleaners

Polaris 340 Available at Aegean Pools

Polaris 340 Available at Aegean Pools

In the last class we talked about automatic pool cleaners that operate on the pressure side of the filter system, this class we are going to discuss cleaners that operate on the suction side of the system.

Most people don’t realize that there are two sides to your filter system; there is a suction side (also known as vacuum side) This side of your system starts at the pump and goes back to the pool.  Your skimmer(s) and main drain are connected to this side of the pump and the water is drawn into the system by the pump.  All plumbing after the pump is considered the pressure side of the system because the water is being pushed out of the pump from here.

So these styles of cleaners connect to either the skimmer on the side of the pool or a port on the side of the pool called the vacuum line.  Most connect to the skimmer.  Just like all automatic pool cleaners they have their pluses and minuses.  Before we get into the details lets take a look at the history of this type of automatic pool cleaner.

Back in the late 1970’s Kreepy Krauly was introduced to the U.S. Market, this was the first suction side automatic pool cleaner.  As I understand it the cleaner was designed by a South African auto repair technician for his son who cleaned pools for a living.  The design was very simple, so simple in fact that it only had one moving part!  It has a hammer that causes the cleaner to jump slightly, when it jumps it moves backward following the weight on the hose.  The trick with this cleaner is finding the right balance of weights on the hose that will cause the cleaner to move in a random pattern.  After the turn of the century Pentair made an agreement with Kreepy Krauly to buy the company and sell Pentair’s entire cleaner line under the Kreepy Krauly name.

Not long after the successful introduction of Kreepy a competing cleaner arrived on the market under the name Baracuda.  Baracuda looks similar to Kreepy, however instead of using a hammer it uses a diaphragm that constricts the flow of water achieving the same effect as the hammer in the Kreepy.  Zodiac Pool Care owner of the Polaris Vac Sweep eventually bought out Baracuda.

After the success of these two cleaners, Arneson Pool Vac created the Pool Vac.  This new style cleaner uses an “A” frame technology with a turbine and an off center cam that causes the cleaner to walk around the pool.  Arneson Pool Vac also made the Pool Sweep, which was mentioned in the last class as a pressure side cleaner.  Arneson later sold it’s designs to different companies.  Hayward bought the Pool Vac design and added additional versions including; Navigator, AquaBug, Pool Vac Ultra, Diver Dave and Wanda Whale.

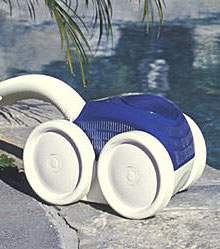
Then came along the Polaris 340.  This was Polaris’ answer to the Florida suction pool cleaning market.  It uses a turbine drive mechanism but instead of being off centered it drives wheels and rolls around the pool like the Polaris pressure side cleaners.  Like other suction side cleaners it does not handle large debris well.  This cleaners name was later changed to Polaris ATV and finally discontinued.

I mention these four cleaners because they are the basis for all the later designs by other companies after patents ran out.  There are lots of different manufactures making all kinds of suction side cleaners today.  Just about anybody making an automatic pool cleaner has a suction side cleaner.  The reason for this is it is a very popular type of cleaner in the Florida swimming pool market.  In Florida pools are almost as common as cars, and a large percentage of pools in Florida are screened in.  The screening filters out large debris from falling into the pool so the automatic pool cleaner is not burdened by a lot of large debris.  This style of cleaner is less expensive than other types of pool cleaners and does not require a second pump to power it allowing a much lower price point than a pressure side cleaner.

What are the advantages of a suction side cleaner?  The most important advantage is the price point, these cleaners range anywhere from $150 to as much as $600 depending on the model and features.  Plus, this type of cleaner does not cost any more to operate because it runs off your existing pool pump.  If you don’t get a lot of large debris in the pool and the bottom of the pool is in good condition this cleaner will perform well.

What are the disadvantages of a suction side cleaner?  Like any automatic pool cleaner this style is not perfect, it will miss spots around the pool because it goes in a random pattern.  If the cleaner has hose weights that need to be adjusted to find the right balance to make it go in a random pattern (each cleaner is different and is effected by the pool shape and surface so there is not a standard setting) it can be madding trying to find the correct balance.  Word of advice if you have this style cleaner and you achieve the perfect balance DO NOT MOVE ANYTHING, or you will spend hours trying to find that sweet spot again.  This style of cleaner does not handle large debris well because of its clearance to the pool surface.  The suction port is on the bottom of the pool, if it should draw large debris into the unit it can get clogged in the head, if it does make it through the unit it will end up in the skimmer basket.  If you have a lot of debris in the pool the skimmer can get clogged starving the pump for water, which would be a big huge problem for the pump.  This is one of the reasons this cleaner works well in a screened in pool because the screening eliminates a lot of large debris and there wouldn’t be any skimmer clogging issues.   Also, since these cleaners require you to restrict your suction down to the skimmer you are hooking the cleaner to you have now stopped skimming the surface of the pool.  This is not a problem with screened in pools but a problem if the pool is surrounded by lots of trees.

One other big issue with this type of cleaner is that it is bottom dependant.  In concrete and fiberglass pools that dominate the Florida market it generally was not a problem, however in vinyl liner pools where you can have imperfections (wrinkles and sink holes and perfect angles) suction side cleaners can get hung up and may need a kick to get going again.  At this point it goes from being an automatic pool cleaner to being a semi-automatic pool cleaner.  The Polaris 340 (ATV) did not have this issue because it operated with large wheels that just rolled over any problem area.

Over all this style of cleaner works well but they are really best suited for screened in pools or pools that do not have a lot of debris falling into it from surrounding trees.  Just like any automatic pool cleaner if it works in your pool you will love the fact you don’t have to clean the pool and like all automatic pool cleaners they tend to have their own personalities and their owners end up naming them just like the would name a pet.

That is it for this class next class we will talk about robotic pool cleaners and wrap up our semester until next spring, so don’t be late for the next class!

Pool School 109 Pressure Side Automatic Pool Cleaners

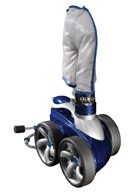
Polaris 3900 Sport Available at Aegean Pools.

Polaris 3900 Sport Available at Aegean Pools.

There are three types of automatic pool cleaners on the market today.  They are; Pressure side cleaners, suction side pool cleaners, and robotic cleaners.  This topic is way too large for one class so we are going to address each type in separate classes.  Today we are going to start with pressure side cleaners.

Pressure side cleaners are the granddaddies of automatic pool cleaners.  They work off the pressure side of your filter system and push water through the cleaner, which may seem counter intuitive, but they work.  The very first automatic pool cleaner was the Arneson Pool Sweep which appeared sometime in the 1960’s.  Arneson no longer exists as a company but parts are still available for this cleaner 50 years later!  This cleaner floated around the top of the pool dragging behind it two whips of varying lengths that swept the bottom of the pool pushing the debris to the main drain in the deep end of the pool.  It also had a spray nozzle on the top to clean the tile line of the pool.  While not the best concept it was better than vacuuming the pool manually.

In the next decade a company called Swimrite, no longer in business, came out with the Polaris Vac Sweep.  This unit was light years ahead of the Arneson Pool Sweep because it not only swept the floor like the Pool Sweep did but it also had the ability to vacuum the pool.  You might wonder how a pressure side cleaner that is having water pushed out of it could possibly “vacuum” a pool.  For that we have to go back to the 1700’s and visit with Giovanni Battista Venturi who discovered that Venturi principal.  Basically Giovanni found that when you run water through a compressed tube at a high velocity suction is created.  This suction lifts debris off the bottom of the pool and into the bag at the top of the Polaris.  The Polaris Vac Sweep was such a huge success that Swimrite shut their doors and started a new company under the name Polaris.  This cleaner ruled supreme for many decades and still to this day has a major share of the pool cleaner market.  Since the inception of the Polaris unit there have been many versions with the most current the Polaris 3900 Sport.

There have been several other pressure side cleaners on the market that have appeared in our local market and they include; Jandy Ray Vac, Hayward Viper, Hayward Viio, Hayward Phantom, and the Letro Legend.  While the Letro Legend is still available from Pentair under the name Kreepy Krawly Legend, the other cleaners are no longer manufactured.  One common thing with most pressure side cleaners is they require the use of a booster pump.  A booster pump is an additional pump installed on your filter system that provides the boost in water flow that the cleaner needs to make them perform.  There are some pressure side cleaners that do not require a booster pump, however you will have to divert all the water from your filter system through the cleaner, which will reduce your system’s water flow.  While not the best option if you don’t have a dedicated line or you don’t want to install a booster pump this is a great option.  The non-booster pump cleaners are not as efficient as the units that require a pump but you should not let that deter you from using these cleaners to help keep the pool clean.

The most efficient way to install these types of automatic pool cleaners in the pool is to have a dedicated line going from the filter equipment to the pool.  Although it is possible to install an over the deck configuration with a Polaris Vac Sweep, it is not the preferred method of installation.  Over the deck installations are not available for the non-booster pump cleaners.

These automatic pool cleaners are reliable performers and will provide years of operation before they will need repairing, but just like your car the more you run your cleaner the sooner you will need to have it repaired.  Just like Superman has his kryptonite some pressure side cleaner have theirs as well.  In the case of the Polaris booster pump cleaner family, and the Pentair Kreeepy Krawley Legend it is sand.  The sand will get into the bearings in the wheels and jam up the bearings; the only repair for this issue is to replace the bearings.  We recommend that if you have sand in your pool manually vacuum your pool before using the your manual vacuum system and if your pool is near the beach you may want to consider a different type of cleaner.

While pressure side cleaners seem fairly simple in design troubleshooting a problem really requires someone who has been trained and has experience to address the issues.  For this reason we recommend your take your equipment to a professional like Aegean Pools for repair.  The nice thing about automatic pool cleaners is they are portable and easy to bring to the store for repair.

There is one other common thing to automatic pool cleaners in general and that is they become a mechanical family pet, and just like any pet they get a name.  I think it is safe to say that a majority of automatic pool cleaner owners have named their cleaner.

Key points for operating a pressure side automatic pool cleaner:

– Most Pressure side cleaners require a booster pump to be running in order for the cleaner to operate.  This pump will not run unless the main pump is running.

– Don’t let the debris bag get overloaded it will negatively effect the operation of the cleaner.

– If you have a Polaris 180,280,380,480, or 3900 Sport and it is tilting to one side when it is running, you need to replace the float head (the little football looking device on the back of the unit.)

– If you take your Polaris 180, 280, 380, 480, 3900 Sport, or Pentair Kreepy Krawley Legend out of the pool for more than an hour you should remove the supply hose from the top of the head, otherwise the hose may kink and cut the supply of water reducing the cleaner’s performance.

– The nuts that hold the hose in place should be placed on the connector first then the hose slid over the connector and the nut then screwed onto the hose.  If you put the nut on the hose first then slide the hose onto the fitting and tighten the nut from that side the water pressure will push the hose off the fitting.  This is a common mistake made by most homeowners.

– Most pool cleaners will require about 3 hours to get the best cleaning.  Running it longer just wears the cleaner out more quickly.

– Using the cleaner twice a week will help keep the pool clean and free of algae.

– All automatic pool cleaners are designed to keep a relatively clean pool clean.  They are not really designed to take a pool from disaster to clean.

We are done with today’s class, in the next class we will talk about suction side automatic pool cleaners.   Class dismissed.

Pool School 108 Manual Vaccuming The Pool

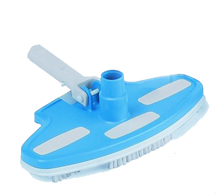
Rainbow193VinylVacThumbManually vacuuming the pool is an important step in caring for your pool.  By using your manual vacuum you will be systematically cleaning the entire pool, something that no automatic cleaner on the market today can do.  This fact is often overlooked because vacuuming the pool can be an arduous task, and who wants to perform an arduous task?  But if you know how to set the vacuum up properly, vacuuming the pool is a lot easier.

Follow these easy steps to set up the manual vacuum:

  1. The multiport valve, also know as the backwash valve (if you have one), should be in the filter position
  2. Turn the main drain valve (if you have a main drain) off or ¾ off, what gives the best suction
  3. If you have more than one skimmer, you’ll need to plug the skimmer you’re not using.  Always use the skimmer closest to the filter system
  4. Assemble the vacuum hose to the vacuum head; ensuring that the swivel end of the hose (this is referring to the cuff that is attached to the end of the hose) attaches to the vacuum head.  This is important because if you attach the wrong end of the hose to the vacuum head you may not be able to vacuum the pool because the vacuum hose will allow air into the system and the pump will lose it’s prime.  Not all vacuum hoses have a swivel cuff; the best way to determine if your hose has a swivel cuff is to grab the hose with one hand, and with the other hand try to turn the cuff.  If it rotates 360 degrees then you have a swivel cuff.  If it does not rotate it is a fixed cuff.  You need to check both ends of the hose because only one end will swivel
  5. Attach the vacuum head to the pole and place it in the water.
  6. Connect the vacuum plate to the vacuum hose (if you have one) at the opposite end of the vacuum hose from the vacuum head.  Using a vacuum plate is very important, it keeps large debris from getting stuck in the plumbing that may require a service call to remove the debris from the plumbing.  The cuff at the end of the hose you are attaching to the vacuum plate should be the cuff that does not swivel
  7. While the pump is running, place the end of the hose, not the end with the vacuum head, over the return and allow the hose to fill with water until all the air in the hose has been removed.  Make sure you are holding onto the pole when you do this or the pole may slip into the pool
  8. Without lifting the hose or vacuum out of the water; move them to the skimmer (keeping everything in the water!) Note: If you don’t have a vacuum plate, remove the skimmer basket, slide the hose under the water, and down into the hole farthest from the pool at the bottom of the skimmer.  We do not recommend you use this method as you could possibly clog the piping with large debris.  Rather, we recommend you leave the skimmer basket in place, ensuring that it is not damaged, place the vacuum plate on top of the skimmer basket
  9. Begin vacuuming the pool.

Once you have the manual vacuum set up you will want to pick a spot at one end of the pool, and systematically vacuum the bottom of the pool.  Then starting at one point on the wall, vacuum the walls starting just below the tile line going down to the floor.  Don’t forget to vacuum the stairs if you have them, however, you don’t want to vacuum the very top step as there will be too little water and the vacuum will loose it’s prime

Once you are done cleaning the pool rinse the equipment with fresh (not pool water) and make sure you store your vacuuming equipment out of direct sunlight because the UV light will oxidize the plastic housing and bristles making them brittle.

Class dismissed until next time, now go out and enjoy your pool!

D.E. Scoop Conversion Chart

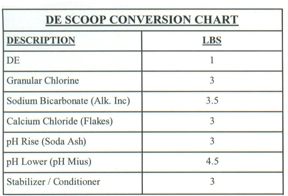
DEConversionChartWebOne of the most frequently asked questions here at Aegean Pools is, “How do I measure that dosage of (insert chemical name here)?  On almost every pool we build we install a D.E. Filter and with this filter we give the new pool owner a D.E. Scoop, the scoop can be either orange or blue in color.  This scoop is designed to hold one pound of D.E., however, since every product has a different specific gravity the weight of each product the scoop will hold will be different. So, we created a D.E. Scoop Conversion Chart!  This chart converts different products into a specific weight in a level D.E. Scoop.  If you don’t have a D.E. Scoop we have them in stock at Aegean Pools Retail Store.

A few words of caution:

NEVER mix different chemicals together in the same container.

NEVER add granular chlorine directly to the pool.  Always mix it in a 5 gallon bucket of water then pour it in to the pool.

ALWAYS rinse the D.E. Scoop thoroughly and dry it before adding a different chemical to the D.E. Scoop.

SAFTEY FIRST WHEN DEALING WITH POOL CHEMICALS!

Pool School 106 Stabilizer

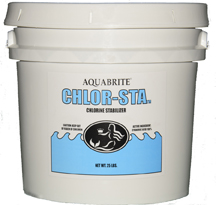
Stabilizer25lbBkSmallWebStabilizer has many different names in the swimming pool industry so this chemical can sometimes be confusing to the swimming pool owner.  The actual chemical, cyanuric acid, is also called conditioner in addition to the classic stabilizer.  Confusion usually occurs from cyanuric acid’s common name “stabilizer” as most people think it does something to balance and stabilize the pool water, however this is not what it is designed to do.  Stabilizer’s sole purpose in your pool is to provide protection for you chlorine from the UV rays of the sun.  Think of it as sunscreen for your chlorine.

If you did not have the correct level of stabilizer in your pool what would happen is you could chlorinate the pool in the morning, and within several hours the chlorine would be down to zero.  When you have zero chlorine in the pool the water will be un-sanitary and algae will begin to multiply because nothing is in the pool water to stop it.  Then at the end of the day, after the sun is off the pool, your chlorine level would recover.  Then the next day when the sun comes up you would go through the cycle of no chlorine again.  Each time that happens the algae and bacteria make bigger advances.

So in order to avoid this problem, stabilizer is added to the pool water, and acts as a guard to protect your chlorine from UV light, keeping the chlorine at the proper level all day long.  With the stabilizer in the water the chlorine level stays constant, so the chlorine is there all day long to stop algae and bacteria from having a party in your pool.

The amount of stabilizer you want to maintain in your pool will depend on the type of sanitizer you add to your pool.  If you are using stabilized chlorine tablets you will want to maintain at least 25-ppm of stabilizer.  If you have just refilled the pool you will need to give your water a little boost of stabilizer to get going and the stabilized chlorine tablets will build your stabilizer level from there.  If you have a salt generator, use Calcium Hypochlorite or Sodium Hypochlorite then you will have to add additional stabilizer.  With these systems you want to maintain between 50-ppm and 70-ppm.  Chlorine is the only sanitizer that can be protected from UV light and some systems do not require stabilizer because they are not affected by UV light.  For more information about other forms of sanitizers see Aegean Pools Pool School 101 on Word Press.

Another misconception about stabilizer is an issue some pool professional’s call “chlorine lock.”  Some companies will tell you when your stabilizer is over 100 ppm you will need to drain water out of the pool to lower the level.  If you have a commercial pool this would be true, because the health department requires the stabilizer be less than 100 ppm.  This is because of the high volume of people introducing contaminants into the pool water; high levels of stabilizer can interfere with chlorine’s ability to sanitize the water.  In residential pools you will be fine until you hit the 150-ppm to 175-ppm level.  The problem with stabilizer is that it adds solids to the pool water, imagine if you will a football field, if you were going to walk from one end to the other to retrieve something at the other end, it wouldn’t take you any time at all because there is nothing blocking your path.  Now imagine that same football field as a jungle, if you now have to hack your way across that same area it is going to take you a lot longer to reach your goal of the other end.  This is the type of problem that the chlorine encounters when the stabilizer level is over 150 ppm it increases the time it takes for the chlorine to sanitizer the pool water.

You only loose stabilizer from the addition of fresh water or a special cyanuric acid lowering chemical.  So as you add water to make up for splash out, you vacuum the pool to waste, or it rains in the pool you will loose stabilizer and need to compensate for the loss of stabilizer by adding additional stabilizer.  How much will depend on how much water you added to the pool.  The best way to decide if you need to add additional stabilizer is to test the water or have the water tested at Aegean Pools.  If you need to lower your stabilizer you can either dilute it with fresh water or add stabilizer remover available at Aegean Pools.

One of the most difficult things about stabilizer is getting it dissolved into the water.  The product is very hard to dissolve.  If you were to throw it into the pool and let it sit on the bottom of the pool it would take over a month to dissolve.  So what we have our customers do is add it to the filter so the water will run over it at a high velocity.  Even with the high velocity the stabilizer will still take at least 2 days to completely dissolve and longer if the water is below 70°.  The concern about adding stabilizer to the filter is how you have to add it.  At Aegean Pools we have specific instructions for adding stabilizer to your filter system, and if you don’t follow them correctly, you could end up with a plugged skimmer line.  When stabilizer gets stuck in the piping it will set up like concrete and it will take, and I don’t exaggerate when I tell you this, years for it to open up again.  If you don’t want to hassle with the possibility of plugging your skimmer line we offer Instant Conditioner (liquid stabilizer) that will make the addition of stabilizer a snap!  You just shake the bottle well and pour it around the pool, done!

And we are done for this class; don’t forget to be on time for our next class!

Pool School 107 Phosphates

POOL SCHOOL 107 PHOSPHATE

SeaKlearPhosphateRemoverCR

SeaKlear Phosphate Remover CR

I want to talk today about one of the most misunderstood and most abused items in pool care and that is phosphates in swimming pool water.  One of the most important concepts to keep in mind about phosphates is that phosphates in and of themselves do not cause algae growth.  There are a lot of misconceptions in the industry that you have to be phosphate free to be algae free this is just not true.  Although I am sure the chemical manufactures would not like to hear that, however it is a fact.  So lets get a little more in depth with phosphates (pun intended).

First lets define algae.  Algae is a plant life, just like the grass in your front yard, and just like the grass in your front yard if you want it to grow well you will want to feed the grass.  You feed your grass by putting down fertilizer.  Fertilizer is a combination of chemicals primarily Nitrates and Phosphates.  Ahhhh…Phosphates.  So if you want your grass to grow quickly and well you put down a specific fertilizer designed for your specific type of grass.  This fertilizer will have a specific blend of Nitrates and Phosphates.  Now remember algae is just like grass in your front yard and if it finds the right balance of Nitrates and Phosphates in your pool water it will grow so quickly and well that your sanitizing system will be overwhelmed with demand and you will come up with zero chlorine or very low chlorine!  The pool may be clear, there won’t be any visible algae but there also won’t be any chlorine in the pool water even though you have been maximizing the introduction of chlorine into the system, or you may have a green cloudy mess you cannot correct with the addition of large amounts of chlorine.

To solve this problem we need to remove the Nitrates and Phosphates from the pool water to take the food source from the algae.  If we remove the food source we will starve the algae.  The problem is we don’t currently have any way of removing Nitrates from pool water, so that leaves us with a method of removing phosphates.  We have any number of chemicals today for removing Phosphates from the pool water we even have chemicals that will help keep Phosphates out of the water with routine addition of the chemical.  But do you really need to do that?  The simple answer would be a qualified no.  I say qualified because most people don’t have a Phosphate / Nitrate issue every year, however that depends on your situation and you may have a chronic issue depending on the make up water you use in the pool.

I think we need to delve here into where phosphates come from in the first place.  Phosphates, like nitrates, are naturally occurring.  Phosphates are everywhere.  They are in your city water, they are frequently in the rainwater, they are in the sprays that your lawn care and pest control companies are spraying in your yard, the are in the decomposing organic matter (leafs) that fall in your pool and if you live in the country near farm land they are in the fertilizers that the farmers are spraying on their crops.  The fertilizers that the farmers are spraying with are seeping into the ground water that you are pumping out of your well.  If you are in the country near farmland and you are using well water to fill your pool you many want to consider a routine treatment of a phosphate remover.  Otherwise you may go years before your Nitrates / Phosphates become an issue.

If you suspect you have a Nitrate / Phosphate issue and want confirmation Aegean Pools can help.  We have one of the most sophisticated phosphate testing methods in all of Hampton Roads and read a test range of 0 to 10,000 ppb of Phosphates in the water.  Rarely do we see readings go over 10,000 ppb.  So bring a sample of your pool water to Aegean Pools for a free checkup of your pool water’s health today.

Pool School 105 Calcium Hardness

16 lb Calcium Increaser

There are two things you want to keep in mind about calcium in your pool or spa; first, calcium is your friend and second calcium is your enemy.  “Wow, Jim, that is pretty conflicted,” you say, but the proper amount of calcium in your water with a proper water balance will keep your water looking clear and protect your pool surface.

The proper level for calcium in your pool will depend on the type of pool surface you have.  Vinyl liner, painted and fiberglass pools will need at least 170 ppm of calcium in the water and levels up to 400 ppm are acceptable.  Concrete pools will need a higher starting point of at least 225 ppm.  If you have a new masonry finish in the pool you will need to pay very close attention to your water balance to protect the new surface from all types of complications once the pool is full.

Why do you need calcium in the pool water anyway?  This is a question we are frequently asked.   Calcium does several things for you; first it helps the filter be more efficient at doing its job to the best of its ability.  If your calcium is too low you may have difficulty getting your pool to clear.  The other reason it is important relates to the other mineral balance in your pool, total alkalinity.  You will recall in Pool School 104, when we talked about total alkalinity, water wants a certain water balance and if it does not have that balance it will begin to satisfy it’s need by drawing chemicals, or mineral, out of whatever vessel it is being held in.  How that translates to your pool will depend on the type of surface you have in the pool.  For people who have vinyl liner pools it will pull plasticizers’ out of the vinyl making the liner brittle.  I had a customer whose wife left him, he had purchased the pool for her and when she left he was over the pool and he turned it off.  The pool sat unused for two years.  Not only did he not ever touch the pool, he didn’t even look at the pool.  Fast-forward two years, he has a new girlfriend and she is all about the pool so he figures he better get it going.  He hires someone to come out and clean up the swamp.  The problem is the chemistry has been so neglected that the liner has not only badly wrinkled from low pH and no alkaline minerals, the liner has turned so brittle that when you push a brush across the folds of the wrinkles the liner cracks, because it is brittle from low calcium.  Needless to say he had to replace the liner.

So what happens if the calcium is too high?  Calcium in and of itself is not a problem; it is when you combine it with other minerals in the water that it becomes an issue.  Temperature also is a factor in overall balance of minerals.  We just talked about what happens if the water isn’t satisfied with the mineral balance but the other side of the scale is when there are too many minerals in the pool water.   What happens is the water has to release something and the first thing it gives up is calcium.  Calcium will deposit it on the surface of the pool making the surface feel like sandpaper.  Think of it like over-eating, if your stomach can’t hold any more food it will, not to be graphic, get rid if it.  Not a pleasant experience, and while removing calcium from the surface of the pool is not exactly the same thing as what your stomach just did, it is still an arduous, un-pleasant task.  Removing calcium from the surface of the pool will usually take about 2 to 4 weeks and require the addition of a chemical specifically designed to re-dissolve the calcium back into the pool water and hold it there.  It will also require you to brush the surface of the pool everyday in order to facilitate the scale removal.

The other unique thing about low calcium is that it can make the water have a slight green tint to it.  We usually see this in pools where the calcium level is below 100ppm.  The water will be clear, it just will have a green tint and shocking does not clear the green tint.  I once had a commercial customer that was an hour ride from my store, and they called me and told me the pool was clear but green, and when they shock the pool it doesn’t go back to blue.  So I told them I needed a water sample to resolve the problem.  They made 2 more attempts to solve the problem themselves, one of which involved the chemist from the local paper mill.  The paper chemist had declared the water in perfect balance, but the pool water was still green.  They called me again, and again I asked them to bring me a sample of the pool water, since they had not had any luck so far they finally relented and brought the sample to me.  When I tested the water I discovered that the calcium hardness was at 30ppm, way to low, I had them add a sufficient amount of calcium and, low and behold, the pool was blue again.  While the paper mill chemist was an expert at paper chemistry he really did not understand swimming pool chemistry.

This concludes this class on calcium hardness, next class will be on stabilizer so make sure you are on time, late arrivals will be sent to the principals office!

Pool School 104 Total Alkalinity

Total Alkalinity Increaser 25lb Bucket

In Pool School 103 I talked about pH and how people get confused with the terminology when we refer to the pH being either Acidic or Alkaline, so Pool School 104 is where we are going to clear up that confusion and explain why this mineral level in the pool is important.

When we are talking about Alkalinity we are really talking about Total Alkalinity, which is a measure of all the alkaline minerals, dissolved into the pool water. Remember when the pH is above 7.0 the pH is considered alkaline, but here we are talking about alkaline minerals dissolved into the pool water not pH (the amount of hydrogen in the water).

The question often posed to us is; Why is Total Alkalinity important? There are actually two mineral balances that are important to your pool water and water in general; they are Total Alkalinity and Total Calcium Hardness. In this class I am just going to talk about Total Alkalinity and I will address Total Calcium Hardness in Pool School 105.

You will want to remember this for this class and for the next class; water wants a certain water balance, if it does not have that balance then it will go looking for it in whatever vessel it is being contained in. So in our case it is the surface of the pool that will be in jeopardy if the water is “out of balance.” Vinyl and painted surfaces will be the most often affected if your Total Alkalinity is not properly maintained.

What is the correct level for your pool? There isn’t actually one level that you would maintain but a range, we like 100 ppm to 150 ppm. This range gives you a good buffer. Some sanitizing systems require a different range usually 80 ppm to 100 ppm. People who use Ionizers (we talked about in Pool School 102) would maintain this level in the pool. There are some areas of Hampton Roads where getting the Total Alkalinity down below 150 is almost impossible because their make up water is very high in Total Alkalinity, for these customers we usually will allow up to 200 ppm but we have to balance that with the Total Calcium Hardness so we don’t end up with other problems in the pool.

What happens if the Total Alkalinity is below 100 ppm? The lower the Total Alkalinity the more difficult it will be to maintain a steady pH level. Total Alkalinity actually acts as a buffer to the pH, like a shock absorber so you don’t get big swings of the pH when you are trying to adjust it. In addition, you can actually get the Total Alkalinity down to zero (0) where there are no alkaline minerals in the water. This is a condition you really don’t want because the water is going to begin removing minerals from the surface of the pool and in a vinyl liner pool you will begin to see wrinkles form as the liner begins to relax and stretch. The wrinkles can only be removed by replacing the liner.

What happens if the Total Alkalinity is above 200 ppm? When the Total Alkalinity is too high it will have the opposite effect on the pH from a too low situation. So it creates a pH lock where you cannot get the pH level to move no matter how much pH lower or pH rise you add. It may also, if the pH gets too high, create an environment where scale is likely to form anywhere and everywhere on the pool surface, plumbing and equipment. When scale forms it is very difficult to remove from the pool surface, note I said difficult I did not say impossible. It takes weeks for the chemicals that remove scale from the pool surface to do their job, so prevention is your best protection.

Total Alkalinity is not a balance that changes day to day like Chlorine and pH, Total Alkalinity is a more long-range balance. What causes Total Alkalinity to change? Total Alkalinity has to be affected in order for it to change. The most common thing to affect Total Alkalinity is rain; rainwater is distilled water that has no minerals. So if you get a lot of rain your Total Alkalinity will be decreased the more rain the more the Total Alkalinity will be affected. If we get a hurricane with 20” of rainwater you can pretty much plan on having to adjust your Total Alkalinity. The other thing that affects Total Alkalinity is stabilized chlorine tablets and muriatic acid. Stabilized chlorine tablets have a pH level of about 2, so when they are dissolved into the pool water they drag down the pH level and the Total Alkalinity. At least once a week it is important that you check not only the chlorine level in your pool but also the pH level. You will usually find that the pH level will have dropped and will have to be adjusted up to keep the pH from falling below 7.0. If you let the pH level drop below 7.0 the water has gone from alkaline to acidic, once the water is on the acidic side it will begin to dissolve all the alkaline minerals from the pool water slowly dragging down the Total Alkalinity. If you let this go on for weeks on end you will end up with zero (0) Total Alkalinity, a very bad place to be. The other thing that affects Total Alkalinity is muriatic acid, we use muriatic acid to lower the Total Alkalinity when the level is 200 ppm or higher. There is a specific process we use to lower Total Alkalinity when using muriatic acid. When you have the water tested here and we determine that it needs to be decreased we will give you specific instructions on how this is to be done.

Some important things to remember; the Total Alkalinity does not change everyday and really only needs to be checked and adjusted every two to three months. If you are using stabilized chorine tablets keeping the pH above 7.0 is very important and should be checked and adjusted weekly. If you are busy and really don’t have time to keep close track of the pH we have a product that will help keep the pH in check called Balancer Tabs. When you add your chlorine tablets to your chlorine feeder you put one Balancer Tablet in the skimmer for every chlorine tablet you put in your chlorine feeder. NEVER put the Balancer Tablets in the chlorine feeder or the chlorine tablets in the skimmer with Balancer Tablets. Using Balancer Tablets will make it less likely the pH and Total Alkalinity will go way out of whack, but they do not eliminate the need to test the pool water at home or at our test lab, they just help keep the water balance from going too far out of whack.

Now that you have a better understanding of Total Alkalinity in Pool School 105 we will be talking about Total Calcium Hardness and your pool water, don’t be late for class!

Jim Garrison
The Guru of Pools at
Aegean Pools.